PowerDesigner offers the possibility to edit the properties for a database in the so-called DBMS resource files. The DMBS resource files contain all information for PowerDesigner to generate DDL, DML and other SQL artifacts. For many databases, there are pre-built, included DBMS resource files for the different database versions.
For example, Microsoft SQL Server 2012 and 2017 or Snowflake. With the built-in feature of PowerDesigner to edit DBMS resource files, it is possible to implement most of the described tips and tricks. Or in other words, to solve the problems, bugs and oddities.
Create a customized PowerDesigner DBMS resource file
Since PowerDesigner does not allow to modify the original DBMS resource files, it is necessary to copy the currently existing and used DBMS resource file. Preferably to a completely different location. Here is a quote from the PowerDesigner help:
The resource files provided with PowerDesigner inside the Program Files folder cannot be modified directly. To create a copy for editing, use the New tool on the resource file list, and save it in another location. To include resource files from different locations for use in your models, use the Path tool on the resource file list.
To copy a DBMS resource file, open the List of DBMS dialog via the Tools -> Resources -> DBMS... menu.
Clicking New opens another dialog to create a copy of the RDBMS resource file.
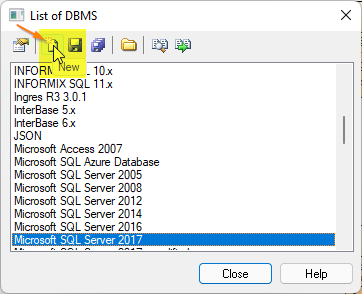 In the example shown here, the new DBMS resource file with the user-assigned name 'Microsoft SQL Server 2017 - modified' is copied from the DBMS resource file 'Microsoft SQL Server 2017'. The procedure is same for all other DBMS resource files.
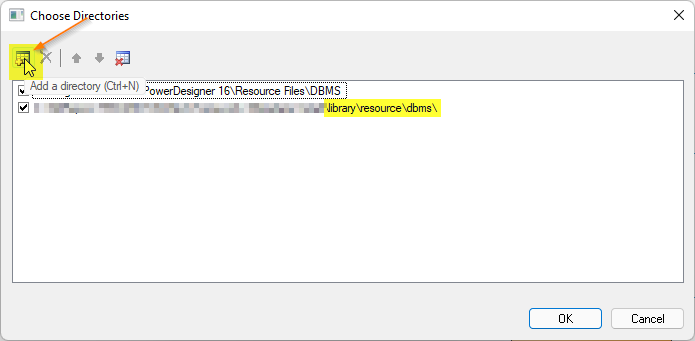
 After confirming with OK, you can and should select a new location for the DBMS resource file. For example, in your own Git repository to enable versioning, backup, and distribution in the team.
If you do not select a new location, you can skip the following steps. Otherwise, the new location must be registered in PowerDesigner.
Clicking on Path opens another dialog to add the new location to the RDBMS resource file:
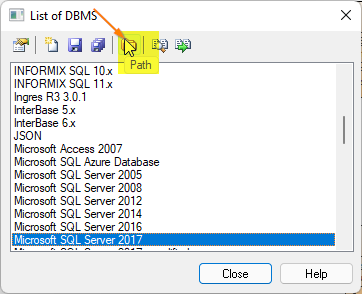
Click on Add a directory to add the new location for the copied RDBMS resource file. In the window that now opens, select and confirm the location used for the RDBMS resource file. The new location is now known to PowerDesigner.
The new path for the DBMS resource file in the example shown here ends on:
\library\resource\dbms\
Our newly created RDBMS resource file can now be modified. To do this, open the DBMS Properties dialog via the Database -> Edit Current DBMS... menu.
But that's another story. More about this in the next article of the series. You definitely have to stop by again.
So long
Yours Dirk
Back to the PowerDesigner series: PowerDesigner Series